Wednesday, December 29, 2010


We're getting ready for our first show in 2011!

All sorts of new and exciting items are being sorted into containers for the short trip to the Raleigh area. You will
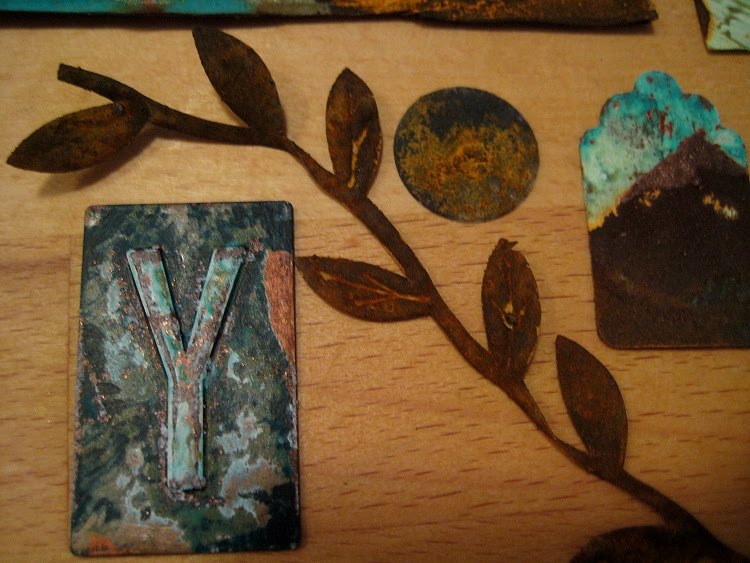
find fresh fibers, cherished charms, beautiful batiks,
vintage valuables, fabulous finds,
assorted accouterments and
one of a kind necessities.


Not only will Random Arts be vending at the
Quilt, Fiber Arts and Mixed Media event,
we will also be teaching workshops
on Friday night, January 7th at
the Hampton Inn in Sanford.
Ask for the special event rate
and spend the night in creative bliss
with other like minded artists.
Louise McClure is offering a 2 hour
workshop from 6-8pm
Shabby Chic Floral Assemblage
$35.
Tattered Bird Collage with Jane
is fast, easy and fun. Best of all
you need very little supplies to create
"personalized bird art".
Offered from 8-10 pm
Cost: $20.

Register for the workshops now
as the space is really really limited to 12.

Email:
randomarts@charter.net

Wednesday, December 15, 2010

Tear it girlfriend, tear it!


On a cold and blustery afternoon in the mountains of
western North Carolina, 8 of us gathered to have some
fun tearing, pasting, designing and completing our
Tattered Mosaic Art Bird Collage.


And, as you can see from the pictures below, it was a complete success,
with each piece being quite different from the others.
It's truly amazing how far a few magazine pages will
go to create such interesting works of art.
Not only that, it is quite addictive as well.


• On Friday, Jan. 7th, we will be teaching this workshop from 8pm-10pm
(Just $20.)
and Floral Fragments Assemblage 6-8pm in Sanford, NC
It is so easy to create these two, translucent, lacy flowers with vintage button
and Swarovski glass pearl centers.
We will use spun polyester mixed media sheets, pre-cut in basic floral and leaf shapes, for our textile artwork.
Learn to apply text and images & build layer upon layer of colors using a magical collection of mists, water colors & alcohol inks to achieve dream~like translucent effects. By adding the secret touch, you will sculpt these lifeless shapes
into lacy petal and leaf forms.

Further enhance the edges of your shapes with dazzling dimension.
Stack the individual elements to create two, multi-layered assemblages, one with a vintage button center and another with a Swarovski glass pearl center.
You will Explore various methods of cold connections to finish your personal adornments which can be applied to pins for a grand embellishment on clothing &
unique attachments to use as accents on bracelets and necklaces.
$35 includes kit fee and all materials

on Friday, Jan 7th at our hotel, The Hampton Inn during the Quilting Arts and Mixed Media Event . Register by email randomarts@charter.net

Now, on with the show.....

Carol Lee and Madelyn Butts are creating
with "purpose" on their special creations
here at the studio


Marsha DuPre is almost ready here to
add her collaged bird to her substrate.


Dee Siwek from Boca and Saluda
successfully created a very textured bird
using some favorite words and colors.
We hope that Dee, as well as Madelyn, share
their finished results with us so we can post them here.


Marsha DuPre from 96, SC made the trek
up to Saluda for an afternoon of "going outside
the box" collage workshop.


Phyllis Peterson, aka "workshop junkie"
texturized her bird collage and added lots
of vibrant colors.


Carol Lee from Greer, SC envisioned her
bird, and what it would like, way before she got to the workshop.


And, Valerie Summers had "pink" written all over
her creation before she knew it


Saturday, December 04, 2010

Face to Face with artists in Saluda


What a creative day we had here at the studio yesterday
with 11 energetic artists that came
face to face with .....
painting, collage and the sewing machine.


As we all found out...
There are no rules!


Bobbie Stitt loves working with faces and
has a little mosaic thing going...


Unfinished but rockin' the art world by Meg Fowler


Dee Siwek from Florida and Saluda
used water color pencils to create her work of art


Phyllis Peterson loved applying color to
her work
.

Valerie Summers from West Asheville
decided to add some words along with
a layering of diffusion for an interesting look.


Karen Schleier from Taylors, SC
enjoyed taking the day off from work
to "play" outside the lines.


Betsy Libbey from Asheville really made
her piece pop with the addition of the black accents.


Louise McClure from Saluda, kept her
work neutral and mysterious.
"More to be revealed" says Louise.....


Thursday, November 04, 2010

Simple rusting tutorial


Whenever I see a surface that calls me to somehow,
I imagine.... rusting.
That's what happened when I saw this simple
plastic clock; I had to have it and I knew
what HAD to be done.


The Sophisticate Finishes Iron Surfacer comes in
a 4oz bottle and is a dark grey, heavy cream consistency.
I always need to shake it well so all the ingredients
are evenly mixed. In my estimation, after using this
product for years, there is some "real" iron and steel
in this bottle. First of all, the bottle is really heavy. (first clue, huh?)
There's a glass ball that rolls around inside the bottle when
you shake it so when you hear that sound
you know its well shaken.


Next, I pour some out into a little yogurt cup
and with a small sponge brush, I apply the surfacer to the
the clock.
OOOPs, first you might want to rough up the surface of the
clock, since it's a smooth plastic. I either sand it with a fine sandpaper,
or something new that I found etches plastic quite nicely is
Citra Solve Concentrate. Just brush on a coat all over
the plastic, let it sit a while and wipe off with a damp sponge or cloth.
That stuff really etched a plastic cup for me so it is something
that I would recommend.


Here I am applying a coat of the surfacer to the clock.
It looked fairly thin to me after the first coat so I gave it a
second coat after this one dried. The best thing to do is
wait until the next day to do a re-coat. I am not a very patient
person, but I will find more things to rust while I am waiting
and time goes by fast anyway.


When the iron surfacer has dried completely, it's time to apply
the rust solution. This too comes in a 4 oz bottle
and is very liquid, like water although the color is a light blue.
I generously apply this over the entire surface and then it's time
to wait.... again. Sometimes I will get out a hair dryer or
a heat tool to speed things along, but in the long run, time
and patience is of the essence.


Not rusty enough for you? Add another coat.
It's not rocket science - it's ART, so go for it.


Look at the texture after the rusting solution is applied! Isn't it amazing?


Monday, November 01, 2010

Rusting away in Saluda


The Studio here at Random Arts was
filled with 12 very excited artists last Friday, trying
their hand experimenting with the ever changing
iron and rust makeovers of everyday objects.


Each person had a chance to coat several objects with
iron and/or copper surfacer
and while that was drying, the pre-coated
pieces were just waiting for the rust & patina
to be applied.
This is one of those classes where "patience"
comes in handy and if were short of that,
the pre-coated pieces really got the iron rusting
.


We applied iron refinisher to cloth leaf ribbon, aluminum
alphabet letters, manila tags, felt ribbon,
distressed cardboard boxes pieces,
buttons, wholey paper, plastic stencils and lots more.


Not only did we rust and patina a multitude of
objects, a layered collage technique using Golden Paints
was used for the pyramid box to take pieces home.


Thanks to all my little "guinea pigs" who
paid only $15 for me to test out a class that I am teaching
at Artiscape in Ohio next April.

The general consensus was "great class Jane!"

Big thanks to Valerie Summers who thought to take
pictures and was nice enough to send them to me.


Thursday, October 14, 2010

Taking one day at a time

While at Freedom Park in Charlotte this past week,
I wiled away the evening sketching what I saw in front of me.....

and watching a bit of baseball practice.
Thanks Jane LaFazio for giving me the confidence to sketch and watercolor.

Sunday, September 26, 2010

Jane LaFazio Workshop

It is true! We can draw and we can watercolor!
The results were amazing and unbelievable
even after our very first exercise.
This one on top was created by Donna
from Asheville and she had never watercolored
at all, ever before this class.
This was a very interesting exercise toward the
end of the day focusing on "man made" products for inspiration.


This is all the work from our first exercise as we
gathered together and shared our thoughts on our work.
Jane LaFazio brought beautiful fruits, veggies and gourds for us
to sketch so each of us got to try several different things.
As you can see from the photo, the results were amazing.

Thursday, September 23, 2010

Tiny creations filled with love...


When I was in Blowing Rock, these little bottles kept calling to me
and asking me to make something happen with these. Little words
on the outside of the glass were inevitable but figuring out how to
create the "top" was an ever lingering problem.
hmmm NO cork. So what? Who needs a stinkin' cork?
So, what to do? Needless to say, my supplies were limited, being
at a remote location. Hmmm. Then I found a penny size circle of
copper mesh. Ah Ha! Form it over the top of the bottle to create a
little lid and then Louise suggested that we put a head pin through
the mesh, add a bead and a loop de loop for a ribbon or chain.
The process began in creating more of these little gems, especially
finding the right words for the label. Those National Geographic magazines
have some amazing words like, barren, lifeless, 113 oxen, imagine, and
on and on and on.... Oh what fun!

Sunday, September 05, 2010

Why would one go to Cincinatti?


It was an unexpected stop over but after
finding out that the Chicago Cubs were in Cincinnati
playing the Reds last weekend, there
was no other choice but to stop there for the game.


Yes, I am a baseball fan, born into a family of
baseball players and baseball fanatics
just outside Chicago, and there is no
place that I would rather be.... well
maybe no other place.
(let's see, the beach, a great big pool somewhere by the beach....)


After the game we realized that there was much more to
Cincinnati than we thought.
First stop, the Cincinnati Museum
at Union Terminal
Originally built in 1933 as the Union Terminal train station, the building was declared a National Historic Landmark in 1977. Union Terminal stands on a prominent location one mile northwest of the city center. Visitors approach the 10-story, arched, limestone and glass facade of the building from the east through a quarter-mile plaza. The dome is flanked on either side by curving wings. An illuminated fountain, cascade and pool lie in the foreground center. On either side of the main doors, Maxfield Keck's bas-relief figures symbolize Commerce and Transportation. In the late 1980s, the building was renovated and then reopened as Cincinnati Museum Center in 1990. It was recently named one of the top 50 architecturally significant buildings in America by the American Institute of Architects.


It's real close to i-75 so if you need a little break in the middle
of your travels stop in, poke your toes in the pool

out front and wander in the terminal
for an amazing visit.

Sunday, August 15, 2010

Come see us at Create in Chicago


Yes, that's right! Random Arts is "taking it" to the Windy City...
Chicago, Illinois, my hometown.


My kind of town, Chicago is....
My kind of town!
And it's gets even better with
the Cloth, Paper, Scissors Art Retreat
in Rosemont, (near O'Hare Airport) on Aug 25th - 29th.

Random Arts will be there in full color
selling our
"Assorted Goods for Creative Mindfulness".
See us there on Friday, August 27th
from 6-9 when the vendor faire
opens for 3 full hours.

You will find our booth
filled with beautiful, recycled, silk ribbons, "metalluscious" copper mesh,

one of a kind "bingo birds", colorful Batik Bundles,

Metal Works Assemblage packets,


Cityscape Book kits,
Photo Charm Kits, Wings, Mica, InkJet Transfers,

Wholey Paper, Random Arts Exclusive Stencils,
and much, much more.

Stop by and see us at the Rosemont Hilton
5550 N. River Road in Rosemont, IL


Monday, August 09, 2010

Thanks Asheville. . .


Seeing all my creative muse, art friends again
was such an inspiration. All of you are so
busy, filling your days with creative adventures.
I so loved hearing about your newest
ideas and projects.


Each of you bring back so many delightful memories
of our times together on Main Street in Saluda.
We did have a great time feeding each other
with our artful thoughts, critiques and laughter.

If one of us were stuck, someone was always there
to assist us in figuring it out... and we DID figure it out.

With little bits of "blingy" inspiration
we got to where we needed to be.

Thank you girls for all that you have given me.

Monday, August 02, 2010

It's as simple as 1,2,3


W o v e n B o o k W o r k s h o p


(a beginner to advanced workshop
no prior experience with fabric necessary)


August 11th,

10-3


BEFORE
•Simply weaving strips of fabric to start the process


DURING
• Simply stitching the strips together forming a "new" fabric


AFTER
A stitch here, a stitch there, a little "scorching", distressing
and embellishing....

Voila' ! ! !
A dramatic, elegant, utterly unique, one of a kind
Woven Book
FYI* You might even want to use this technique
to create a handbag, satchel or collage elements.

You can complete this book in our all day workshop
here at the new studio on August 11th
for only $40.
We include a pre-made Italian text book block,
forming materials, overlays, & instructions
.
All you need is colorful, cotton fabric strips, fibers, ribbons &
embellishments of your choice.

All this for only $40.
Pre-registration is required.


(a beginner to advanced workshop no prior experience with fabric necessary)
Sewing machine optional but helpful to bring if you have one.